
eSIM Data Plans That Actually Make Sense for Travelers
You’re boarding a flight to Lisbon, and with an eSIM data plan, you’re connected the moment you land—no plastic SIM, no store hunt, no roaming shock. An eSIM is a digital chip inside your phone that you activate by scanning a QR code or tapping a carrier app, letting you buy and switch data plans in seconds. You get instant, prepaid internet in over 150 countries for a fraction of carrier rates, and you control usage, top-ups, and plans right from your device. Just download a plan, keep your main number active, and travel with full signal strength wherever your itinerary leads.
What Exactly Is an eSIM Data Plan and How Does It Work?
An eSIM data plan is a digital profile embedded directly into your device’s hardware, replacing the physical SIM card. It works by downloading a carrier’s configuration file—containing your network credentials, authentication keys, and data allowance—over an internet connection, typically via a QR code or app. Once activated, the eSIM communicates with nearby cellular towers using the same radio hardware as a traditional SIM, but without needing to swap cards. You manage multiple profiles on one device, switching between plans for travel or local use through your settings menu. Data is billed and metered exactly like a normal plan, with usage tracked by the carrier.
The key insight: an eSIM plan is not a separate technology—it’s the same cellular service, delivered as a downloadable, re-writable profile instead of a plastic chip.
Activation takes minutes, and you can delete or reinstall it anytime, making it ideal for temporary connectivity or dual-line scenarios.
Understanding the difference between a physical SIM and a digital profile
A physical SIM is a removable plastic card that stores your subscriber identity locally, tying you to one carrier per slot. A digital profile, or eSIM, is a downloadable file embedded in your device’s secure chip, letting you switch operators without swapping hardware. The core difference: eSIM profiles are remotely provisioned, meaning you scan a QR code or install an app to activate a plan, while a physical SIM requires inserting the card. For an eSIM data plan, your network access is tied to that digital profile, not a physical object. This allows multiple profiles to coexist, though only one is active for cellular data at a time.
| Aspect | Physical SIM | Digital Profile (eSIM) |
|---|---|---|
| Installation | Manual card insertion | Remote download and activation |
| Carrier switching | Replace card | Change profile in settings |
| Space impact | Occupies SIM tray | No physical slot required |
| Data plan management | Tied to inserted card | Tied to selected profile |
How your device stores and switches between multiple carrier profiles
Your device stores multiple carrier profiles as encrypted files in a secure element, effectively letting you carry several eSIM data plans simultaneously. Switching between them is instant: you open your settings menu, select the profile you want, and toggle it active—no physical SIM swap required. Most phones keep one profile active for data while others remain dormant but ready. This dynamic profile switching capability means you can, for example, jump between a home plan and a travel plan mid-trip without rebooting. The inactive profiles stay intact, preserving your balances and settings. Can I switch eSIM profiles without losing my data? Yes—your device preserves each carrier profile’s local data and configuration, so switching back restores everything exactly as you left it.
The role of QR codes and activation apps in setting up your connection
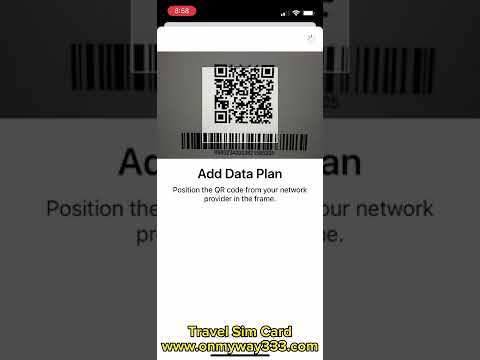
Setting up your connection hinges on two practical methods: scanning a QR code for eSIM activation or using your carrier’s dedicated app. When you purchase a plan, the provider emails a QR code; open your phone’s cellular settings, select “Add eSIM,” and scan it—the profile installs in under a minute, and you’re live. Alternatively, activation apps automate everything: after logging in, the app downloads and configures the profile directly, which is ideal for quick travel changes. Both methods eliminate physical SIM swaps and require only a stable Wi-Fi connection to complete the download. Always ensure your device is unlocked and compatible before starting, then follow the on-screen prompts—the entire process is designed to be error-free.
- Scanning a QR code immediately provisions your device with the correct network profile.
- Activation apps verify your plan and push the eSIM without manual input.
- Both methods require an active internet source, like Wi-Fi, to finish setup.
What Are the Real Benefits of Switching to a Digital SIM for Data?
Switching to a digital SIM for data means you can ditch the physical card hunt entirely—you scan a QR code or tap an app, and you’re online in minutes, even abroad. The real win is hopping between local eSIM data plans without swapping trays or hunting for a store, so you grab the cheapest regional rate the moment you land. You also keep your home number active for calls while a second eSIM handles your browsing, which is perfect for travel. **Why bother?** Because you avoid roaming fees and wasted days without connectivity, all while juggling multiple data plans right from your phone’s settings. No more losing tiny SIMs or waiting for delivery—just instant, flexible data wherever you are.
Why you can say goodbye to roaming charges and expensive international fees
With an eSIM data plan, you can say goodbye to roaming charges and expensive international fees because you purchase a local or regional data package before you land, locking in a flat rate for your destination. This eliminates the per-megabyte costs that traditional carriers impose when you connect to foreign networks. Instead of returning to your home provider’s pricey daily pass, you simply install a prepaid eSIM profile and use that local rate immediately. The process is straightforward: check coverage, buy a data bundle for your travel dates, and activate it on arrival—meaning no surprise bills when your plane touches down.

How instant activation saves you from waiting in line at a store
Instant activation eliminates the physical retail bottleneck by allowing you to purchase and provision an eSIM data plan from your device before you even land. Instead of queuing at airport kiosks or local carrier stores, you scan a QR code or tap a link, and the profile downloads directly onto your phone over Wi-Fi. This means you step off the plane with live connectivity, bypassing passport checks, paperwork, and cash transactions at service counters. If your travel plans change mid-trip, you can buy a new plan remotely and switch profiles in seconds, without ever locating a store or waiting for a staff member to manually configure your SIM.
Keeping your primary number active while using a secondary data line
Keeping your primary number active while using a secondary data line is one of the biggest practical wins of an eSIM setup. You can slot a travel data eSIM into your phone’s secondary slot without ever touching your home SIM, so calls and texts to your usual number still ring through. This means no swapping physical cards, no missed two-factor authentication codes, and no awkward “I’m abroad, email me” messages. Your primary line stays for iMessage, bank alerts, and the occasional urgent call, while the secondary line quietly handles maps and uploads. It’s the simplest way to separate connectivity from identity. Keeping your primary number active while using a secondary data line lets you roam without losing your digital footprint.
Your home number stays live for calls and texts while a secondary eSIM handles all your data needs abroad.

How Do You Pick the Right Data Package for Your Travel or Daily Use?
Start by calculating your actual consumption, not your provider’s “unlimited” claims—streaming in HD eats 3GB per hour, while navigation uses roughly 150MB per hour. For travel, prioritize **regional packages** over single-country plans if you cross borders, since auto-switching carriers on a local eSIM often triggers hidden daily fees. For daily use, select a plan with **a rolling data allowance** and clear fair-use thresholds, as “unlimited” in eSIMs typically throttles to 2G speeds after 20GB. Match your package length to your itinerary—a 7-day plan is wasted on a 10-day trip, but a 30-day plan overcharges for a weekend. *The sweet spot is always the smallest data cap that covers your peak day, not your average one.* Finally, check that the eSIM profile includes tethering if you rely on a laptop, as many budget plans restrict hotspot usage entirely.
Deciding between regional coverage, global packages, or local-only options
Choosing between regional, global, or local-only eSIM coverage hinges on your actual movement pattern, not hypotheticals. A local-only plan wins for a single-country stay, offering the cheapest rates and the most stable local network priority. Regional packages shine when you’re hopping between neighboring countries, like across Europe or Southeast Asia, eliminating re-activation hassle for a moderate price bump. Global packages are your safety net for multi-continent trips, but you pay a heavy premium for that reach, often with slower speeds. Before buying, audit your itinerary: if you never leave one city, a global plan is pure waste; if you’re flying between three continents, local-only becomes a logistical nightmare. Match the zone to your route’s shape, not its size, and you’ll nail the cost-to-convenience sweet spot.
Matching data allowances to your streaming, navigation, and hotspot habits
Matching data allowances to your actual habits prevents both overpaying and sudden throttling. For streaming, calculate that standard-definition video consumes roughly 1 GB per hour, while high-definition uses up to 3 GB, so a 5 GB plan covers only a few movies. Navigation is lighter, averaging 5–10 MB per hour with offline maps, but real-time traffic updates and map tile refreshes double that figure. Hotspot tethering, however, is the heaviest drain—a laptop browsing or syncing can burn 500 MB per hour, easily exhausting a small allowance. Aligning your eSIM data tiers with your dominant usage pattern is the core strategy. Follow this sequence:
- List your daily activities (streaming, driving, tethering) and estimate hours.
- Multiply by the per-hour consumption above, then add a 20% buffer.
- Select the eSIM package closest to that total, preferring a slightly larger tier if you tether often.
This method turns usage-based budgeting into a precise fit rather than a guess.
Comparing validity periods, rollover policies, and top-up flexibility
When picking an eSIM, comparing validity periods, rollover policies, and top-up flexibility saves you from buying twice. Shorter validity (7–15 days) works for quick trips, but a 30-day plan with rollover beats it if your return date slips—just check if unused GBs actually carry over or vanish at midnight. Top-up flexibility matters most for daily use: some providers let you add 1GB mid-cycle, while others force a new plan, killing your remaining data. *A plan that looks cheap on day one can cost double if its top-up minimum is huge and no rollover exists.* Test the provider’s app for instant renewal before committing.
Match validity to your exact travel dates, prioritize rollover for schedule changes, and choose top-ups that fit your real consumption—never assume unused data survives.
What Should You Check Before Buying and Installing Your New Plan?
Before committing to an eSIM data plan, verify your phone is carrier-unlocked and supports eSIM—checking settings for “Add Cellular Plan” confirms compatibility. Scrutinize the plan’s coverage map against your exact travel destinations, not just countries, since rural dead zones are common. Confirm the data allowance is for high-speed usage, not throttled 3G, and check whether hotspot tethering is included if you need it. Also, review the activation method: some eSIMs require QR code scanning with a stable Wi-Fi connection, while others auto-install via an app—know this beforehand to avoid airport delays. Most importantly, ensure the plan starts on your install day, not purchase day. Q: What if my phone rejects the eSIM? A: Immediately contact support for a new QR code, but only after confirming your device is on their approved eSIM list. Finally, read the refund policy for unusable plans, and save your activation code offline in case roaming kills your connection.
Verifying your phone is carrier-unlocked and eSIM-compatible
Before purchasing an eSIM data plan, confirm your device is carrier-unlocked and eSIM-compatible to avoid activation failures. Check your phone’s IMEI through your settings or by dialing `*#06#`; if the device shows a carrier lock or lacks an “Add Cellular Plan” option, it won’t accept a third-party eSIM. Contact your original carrier to request an unlock if needed, and verify your exact model number matches regional eSIM standards—some US or Chinese variants disable eSIM altogether. Finally, inspect your phone’s supported bands and protocols (e.g., 5G SA/NSA) against the plan’s network requirements, as a locked or mismatched device will waste your setup time and money.
Understanding data speed limits, fair usage policies, and 4G vs. 5G access
Before committing to an eSIM plan, scrutinize the **data speed limits** and fair usage policies, as these dictate real-world performance. Many „unlimited“ plans throttle speeds after a daily or weekly data threshold, reducing 4G or 5G access to near-3G levels. Check if the plan caps 5G BazTel eSIM cards access behind a premium tier; if your phone only supports 4G, ensure the plan’s 4G speeds aren’t artificially restricted. Fair usage policies often target heavy streaming or tethering, so review the exact megabit-per-second allowance for both network generations.
Q: How does a fair usage policy affect 4G vs. 5G speed limits?
A: A fair usage policy typically assigns lower speed ceilings to 4G (e.g., 50 Mbps) than to 5G (e.g., 150 Mbps), and after crossing a data cap, both drop to a shared slow lane—often 2–5 Mbps—irrespective of network type.
How to handle installation errors, network registration problems, and APN fixes

If your eSIM fails to install, first verify the QR code or activation code hasn’t expired, then manually enter the SM-DP+ address from your provider’s confirmation email. For network registration problems, toggle airplane mode for 30 seconds, then manually search for available networks and select your carrier; if registration persists, reset network settings but keep your eSIM profile intact. For APN fixes, create a new APN entry using the exact settings from your provider’s help page (typically `internet` or `mobilenet`), ensuring the APN type includes `default,supl`. *If data still fails, delete and re-download the eSIM profile, as a corrupted install often mimics APN errors.*
- Restart the device after any APN change—saved settings only activate post-reboot.
- Check carrier “APN fix” tools in your dashboard; some providers send a silent push update.
- For iOS, erase the eSIM under Cellular > Remove Plan, then re-scan the QR; Android users should clear the carrier services app cache.
- If network registration shows “Not registered,” dial `*#*#4636#*#*` (Android) to force a preferred network type.
What Are the Smartest Ways to Manage and Optimize Your Data Usage?
To manage and optimize your data usage with an eSIM plan, start by leveraging the carrier app or dashboard to set hard data alerts and automatic cutoffs, preventing overage charges before they occur. Use your device’s built-in data saver mode, which restricts background app refreshes, and pair it with eSIM-specific features like local network selection to lock onto stronger, more efficient towers. Download offline maps and content while connected to Wi-Fi, then switch your eSIM to a low-data mode for roaming. Monitor per-app consumption weekly via the eSIM’s usage tracker, and disable auto-updates for large files. Finally, toggle your eSIM to a pay-as-you-go data pack during high-demand periods, then revert to a capped plan for daily tasks, ensuring every megabyte is purposeful.
Tracking consumption in real time through your device’s settings
Your phone’s native settings are the fastest way to track consumption in real time, especially when juggling an eSIM’s data pool. On iPhone, the Cellular menu shows a live per-app breakdown for your active eSIM line, letting you spot a rogue background process instantly. Android mirrors this under Network & Internet, where you can set a billing-cycle alert that matches your eSIM’s reset date, not your SIM’s. Because an eSIM often holds multiple profiles, your device settings let you toggle between them and see each plan’s live usage separately—so you never guess which profile is draining your allowance. Real-time eSIM usage monitoring turns your settings screen into a proactive control panel, not a post-bill shock.
Device settings provide live, per-plan data tracking for eSIM profiles, enabling instant adjustments to avoid overage.
Setting up automatic alerts and using Wi-Fi assist to stretch your allowance
Setting up automatic alerts within your eSIM’s companion app is the first step to avoiding overage fees, as these notifications trigger at custom thresholds like 50%, 80%, and 100% of your purchased allowance. Pair this with Wi-Fi assist, which seamlessly shifts your connection to known networks when cellular signal is weak, thereby preventing unnecessary data burns during background syncing. This dual approach ensures you only consume premium eSIM data when truly needed, while automatic usage thresholds give you real-time control over remaining megabytes. By enabling alerts and Wi-Fi assist together, you effectively stretch a fixed allowance across more days without manual monitoring.
- Set alerts at 25%, 50%, and 90% to pace consumption early.
- Activate Wi-Fi assist to offload large updates to nearby networks.
- Restrict background data for non-essential apps once the 75% alert fires.
- Use carrier app logs to correlate alerts with Wi-Fi-assist behavior.
Knowing when to switch profiles, disable background data, and use offline maps
With an eSIM plan, switching profiles is your first lever: activate your local travel profile only at arrival, keeping your home profile dormant to avoid unintended roaming charges. Immediately disable background data for non-essential apps like social media or email under your eSIM’s data settings, as they silently drain your allowance. Before you go, download offline maps for your destination in Google Maps or CityMaps2Go, then toggle the offline-mode override to prevent the app from refreshing live traffic. This works best when you turn on data only for navigation, then switch back to airplane mode after the route is cached. Master profile switching with offline maps to stretch every megabyte precisely.